Common Latte Art Mistakes & How to Fix Them Like a Barista
Struggling with latte art? Learn common mistakes like poor milk texture & wobbly pours—and how to fix them like a pro barista!
Latte art is not just an aesthetic addition to your coffee; it’s a skill that can elevate your espresso experience to a whole new level. Whether you’re a beginner looking to improve your technique or a seasoned barista refining your skills, understanding common latte art mistakes and how to correct them is crucial for creating that perfect design.
Creating latte art is an art and a science. It requires the right espresso, steamed milk, and, of course, the right technique. Even the best baristas make mistakes sometimes, though. Errors can lead to inferior designs or, at the very least, an unpleasant drink in general. Don't fret if you are struggling with your latte art—most coffee aficionados do too. Here, we'll take you through the most common latte art errors and show you how to fix them like a pro.
With this post, you'll know insider tips and tricks on how to create the art of perfect latte designs. We'll examine each error and offer practical tips that will help you craft beautiful, Instagram-like latte art that not only enhances the looks but also the taste of your coffee.
Mistake #1: Steaming Milk Wrong
One of the most common mistakes of new latte artists is that they steam milk incorrectly. Steaming milk can cause a host of issues, ranging from a lack of microfoam to a foamy, clumpy mess that is not usable.
Why It Happens
The key to great latte art is getting the milk texture and consistency right. Unless milk is steamed to the correct temperature and texture, you can't pour a smooth creamy design. Milk steamed too hot results in scalded milk, while under-steamed milk creates gigantic bubbles, and you can't pour latte art.
How to Fix It:
- Steaming Temperature: The optimal steaming temperature is between 140°F to 160°F (60°C to 70°C). If it is hotter than that, your milk will lose its texture and sweetness. Keep an eye on the temperature with a thermometer.
- Steaming Technique: Place your steam wand below the surface of the milk to introduce air gently. As the froth starts to form in the milk, slant the pitcher slightly to keep the milk moving gently, building that smooth microfoam. Don't introduce too much air, however, as it makes larger bubbles and less cream.
- Perfect Microfoam: The milk should be velvety and smooth with extremely small, even bubbles. Stir the milk in the pitcher after steaming to disintegrate large bubbles and create an even foam.
Mistake #2: Over-Foaming Milk
While microfoam is needed for latte art, over-foaming is also a favorite mistake. This results in a heavy, foamy texture that will not mix well with the espresso, so it is difficult to pour a clean design.
Why It Happens
Over-foaming milk is when excess air is introduced into the milk, making it create thick, foamy milk that's hard to work with. Some beginners overdo it in an attempt to achieve a dense froth but end up with a mixture that's hard to handle.
How to Fix It:
- Steaming Technique: To avoid over-foaming, ensure you’re only introducing enough air to create microfoam, not a massive foam layer. Start by introducing air at the beginning of the steaming process, then submerge the wand to finish heating the milk and achieve the smooth, silky texture.
- Control Air Incorporation: Keep the milk low and consistent whirlpool as it steams. The goal is to keep the texture smooth and even, with no frothy, airy foam that will not allow pouring art.
Mistake #3: Poor Espresso Extraction
Excellent latte art begins with excellent espresso. Without a proper foundation, even the steamiest milk ever will be lacking. If your espresso shot is under-extracted, over-extracted, or too weak, it can negatively affect the overall latte art quality.
Why It Happens:
Poor espresso extraction is most often caused by improper grind size, inadequate tamping, or incorrect water temperature. If the espresso shot lacks depth or consistency, your latte art will struggle to maintain its form and even sink into the milk.
How to Fix It:
- Right Grind Size: Make sure your espresso grind is fine but not excessively fine. A grind that's too coarse will produce weak shots, while one that's too fine can cause over-extraction and bitter flavors.
- Proper Tamping: While tamping the coffee grounds, apply even pressure to achieve a flat, smooth surface. Tamping unevenly can lead to uneven extraction, which will impact the flavor of your espresso as well as the quality of your latte art.
- Dial In Your Espresso Machine: Make it a habit to check your espresso machine's water temperature and pressure regularly to ensure that it is optimized for consistent extraction. Optimal brewing temperature is 190°F to 200°F (88°C - 93°C).
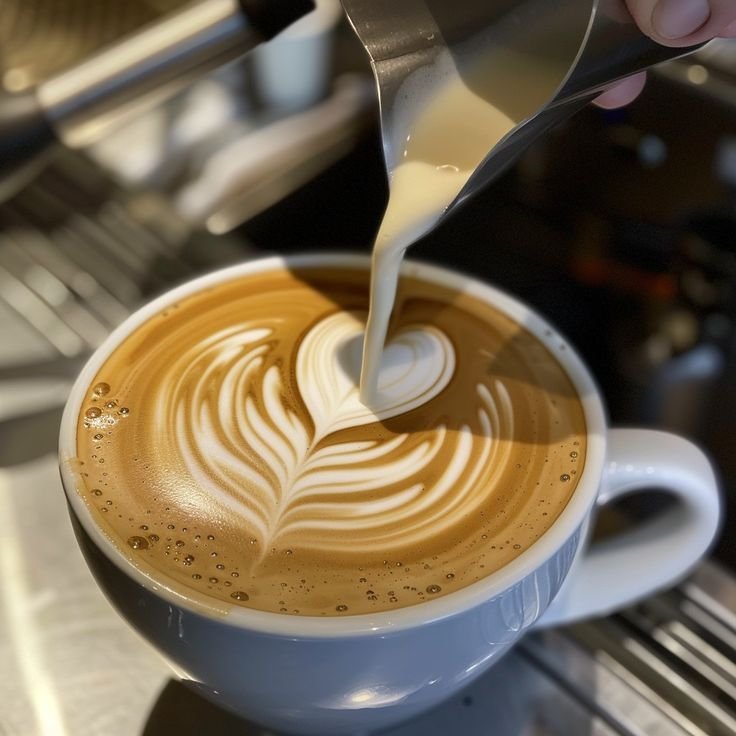
Mistake #4: Wrong Pouring Technique
The pour is where the magic happens, but most newbies get it wrong. A poor pour can lead to latte art that is smeared, uneven, or unrecognizable.
Why It Happens:
Incorrect pouring technique—such as pouring too high, too low, too fast, or too slow—can disrupt the milk’s flow and ruin your design. The key to good pouring is to start slow and controlled, then speed up to form the desired shape.
How to Fix It:
- Low Pour Start: Begin by pouring the milk low down into the cup, so that the milk will mix with the espresso. This makes a smooth base.
- Height Increase for Design: As one approaches the end of the pour, raise the height of the jug of milk a little, so that the milk will flow more quickly and make a design, such as a heart or rosette.
- Control the Pour: It takes practice to perfect controlling the pour. Play around with speeds and angles to find the flow that creates clean latte art the best.
Mistake #5: Rushed Latte Art
Rushing the latte art process is what some people do in the excitement of creating it. Latte art is a delicate technique, and rushing the process can lead to sloppy outcomes.
Why It Happens
As soon as you rush through steaming the milk, drawing the shot, and pouring, you'll have a better chance of failing. Latte art requires a patient, focused, and composed hand.
How to Fix It:
- Slow Down: Pay particular attention to each step in the process—steaming the milk, pulling the shot, and pouring. Hurrying through any of these steps is jeopardizing the quality of your latte art.
- Practice: Practice, like any other skill, is the secret. The more you practice, the more comfortable the technique will become, and the better your latte art will be.
Mistake #6: Failure to Choose the Right Cup
Interestingly, the diameter of your cup can determine whether your latte art turns out well. The cup should not be too wide or too narrow as this will complicate achieving the right proportions for a pleasing design.
Why It Happens:
Using a cup that is too small or too large might disrupt achieving the perfect balance of espresso and milk to get the desired design.
How to Fix It:
- Utilize a Standard Latte Cup: The typical latte cup should be able to contain around 8 to 10 ounces (240 to 300 milliliters) of liquid. Cup size is important because it allows the milk and espresso to blend well, with enough surface area to produce beautiful latte art.
Conclusion
Creating stunning latte art takes practice, patience, and an understanding of the common mistakes that can hinder your progress. By avoiding the errors discussed in this article—like incorrect milk steaming, poor espresso extraction, or rushed pouring—you’ll be able to craft perfect latte art designs that not only look beautiful but also enhance the flavor and texture of your coffee.
By focusing on key aspects such as milk texture, espresso shot, pouring technique, and cup choice, you can elevate your latte art to the next level and amaze friends, relatives, or customers with your barista skills. Latte art is a form of art, and like all art, practice is what makes perfect. Practice and practice, and within no time, you'll be pouring latte masterpieces. Happy brewing and pouring!
What's Your Reaction?